Current Gaming Projects

Showing posts with label TS&TF. Show all posts

Wednesday, March 15, 2017

Game AAR - Russian Civil War, Battle of Tulgas

I am just now posting pics and a brief AAR of a miniatures game that I ran in late February using a heavily modified The Sword & The Flame rules.  I would say that they are so modified that probably only half of the original rules are still there.

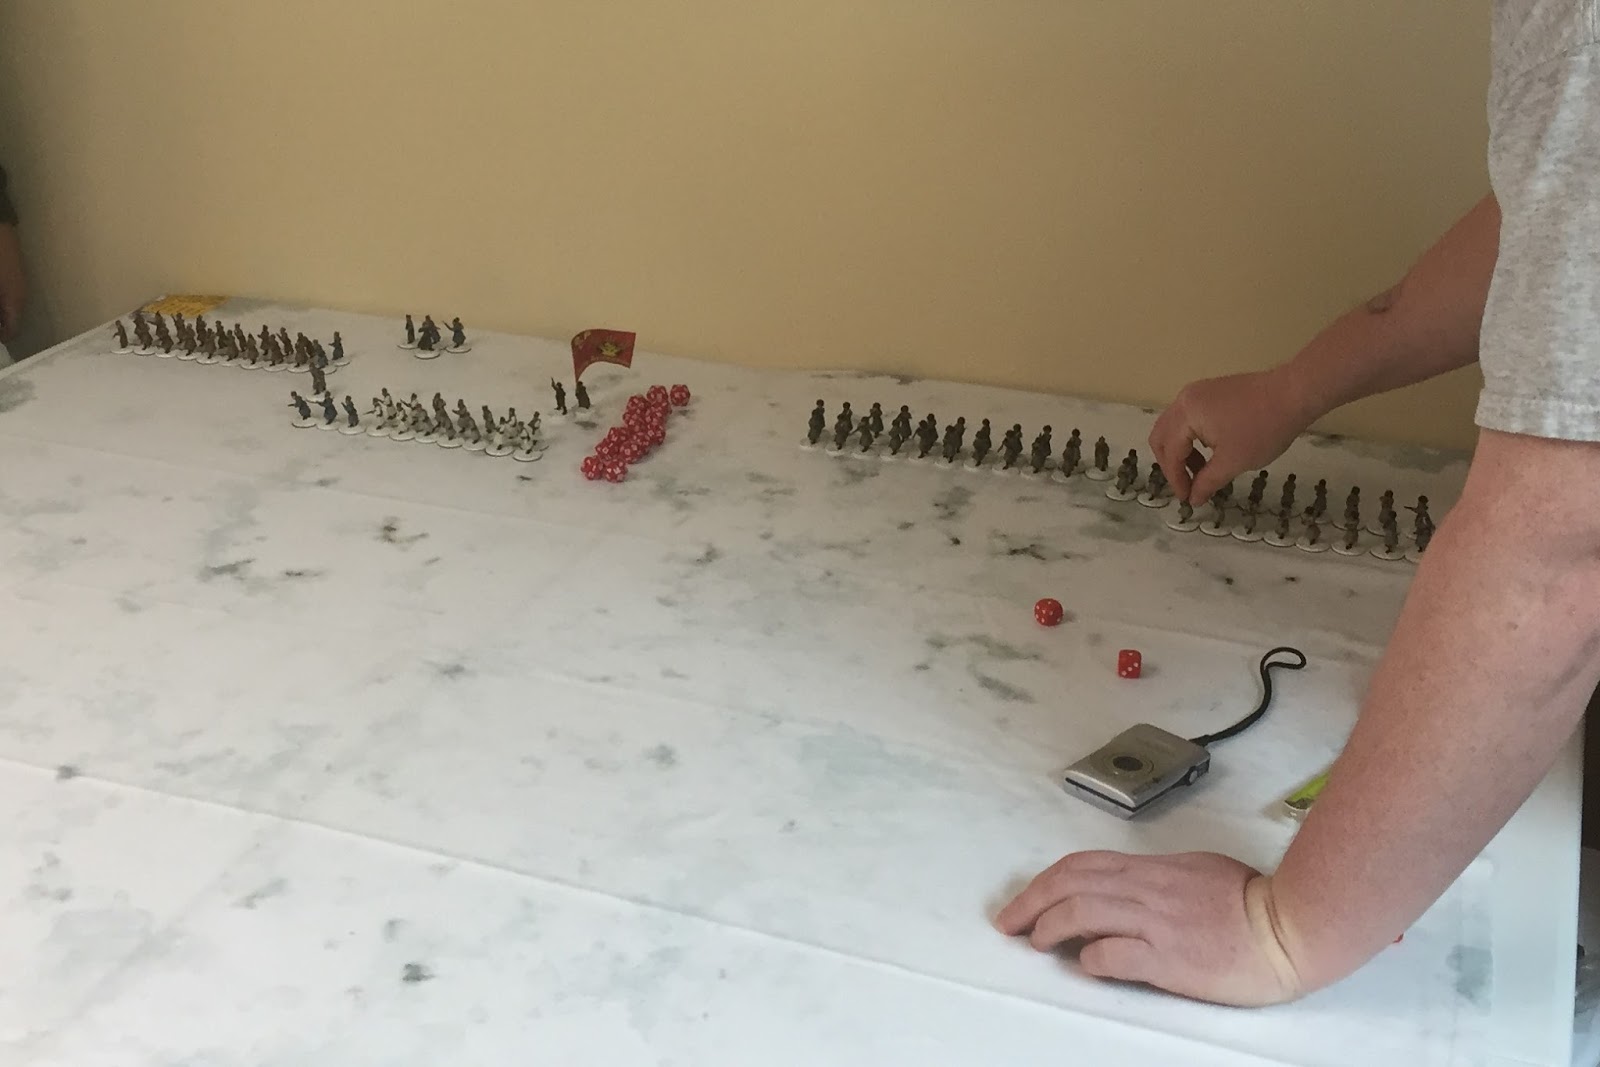
The game was held at Blake's house.  I provided the miniatures and ground mat, plus managed the game and rules.  Blake and Glenn ran the Bolshevik's Red Guard or who were commonly referred to as 'Bolos' by the Allied forces in North Russia during that time.  Steve ran the mixed Allied forces of Americans, British, and Canadians.  The scenario is based on an actual battle which will be explained below.  The actual engagement was across a massively open area which is why there is a lack of terrain on the board.  Also, since I was trying out the new system, I just wanted a massive shooting game to try out that part of the rules.  Future games will be more terrain heavy to reflect the wilderness of Russia.

The scenario's historical text

Prior to the Armistice of the 'War to End All Wars', one of the major combatants, Russia, started to slip into an internal chaos as their government failed in so many levels during the war.  With that, the Tzar of Russia abdicated with a Provisional Government set to replace him with Lvov, then Kerensky, leading the failing empire.  As the Provisional Government started wobbling in the face of defeat, different Allied powers started to send troops to Russia with the Provisional Government's permission to keep it in the war or to prevent war stocks to fall into German hands.  After the collapse of Kerensky's government in the October Revolution, 1917, to the Bolshevik Soviet power under Lenin, the various Allied powers found themselves in combat with the Bolsheviks or to a lesser degree with different opposing factors in the Russian Civil War for the next few years, until 1925, when the last Allied power, Japan, finally withdrew their forces from Russia.

November 11th, 1918

While a war weary Western Europe and United States celebrates the armistice truce with Germany, a small outpost of Americans, British, and Canadians fight for their survival against a foe that outnumbers them 4 to 1 for four days alone.

In the North Russia region of Tulgas are three small villages, Upper Tulgas to the south, Tulgas, and Lower Tulgas to the north all along the Dvina River.  Garrisoning these villages are American soldiers of B Company, 339th 'Polar Bears' Infantry Regiment, British soldiers of B Company, 2/10 Royal Scots, and the Canadian 67th Battery, as well as some British medical personnel running a hospital for the Allied powers and their White Russians allies.

The main Bolshevik force have attacked Upper Tulgas and forced the American platoon that was there to fall back to Tulgas.  The Americans sent out a telegraph that they were badly outnumbered and to send reinforcements before the wires were cut by Bolsheviks.

Just north of Tulgas was the Canadian battery of 57 men and two 18-pdr guns and a squad of American soldiers with a Lewis gun were deployed.  To the surprise of the Allies, the Bolsheviks were able to flank the Allies up to Lower Tulgas through the swampy marsh forest to their west which was thought to be too soft for a rapid flanking attack.  A force of 500 Red Guards came running out of the forest behind the Allies rear positions at Lower Tulgas.  As the only force in Lower Tulgas, the Allies hospital was quickly captured by the Bolshevik force commanded by a giant of a man named Melochofski and his mistress who was following him on the campaign.  

Now Melochofski leads his force in an attempt to silence the Canadian artillery to the south of him and just north and outside of Tulgas, but they must cross 1200 yards of snow covered open land to do it.  Can Melochofski overrun the combined American and Canadians defenders or can the mixed Allies force hold off long enough for the reinforcements from B Company, 2/10 Royal Scots to arrive from Tulgas in time to push the Bolsheviks back?

With that the game is set-up with the Bolos on one end in four groups of 20 figures to represent the four rifle companies in a 1918 Bolshevik Red Guard battalion.  Two companies were a very poor quality Red Guards which the mixed match overcoats on the western board edge and are being commanded by Glenn.  The eastern flank has two companies of aggressive Red Guard with better morale and close assault abilities, but equally poor shots as the other Red Guards.  These two companies are all uniformed and lead by Blake.  Do to the poor leadership qualities of the 1918 Red Guard, each two companies only have one officer and the Battalion staff was made up of one commander (Melochofski), his mistress, and a flag man, which Glenn ran too.

On the opposite side of the board was the Canadian battery and the American protection squad armed with a Lewis machine gun.    They are facing the opposite direction until they pass a notice roll to start reacting to the advancing Bolos.  The big advantage that they have is both the Americans and the Canadians are top quality troops.  The Americans performed very well compared to all of the other Allied units for infantry in the North Russia Expedition and the Canadian battery was a front-line unit that saw action on the western front in WW1.  The relieving British unit was not very good as it was a Category B unit, which is not fit for front line combat.  The British would come in randomly once the Bolos had reached a certain point.  Steve ran all of the Allied forces.

The game ended sort of historically correct.  Melochofski was killed and the Bolos attack collapsed and then retreated back to the wood line north of Lower Tulgas. The Bolos loss probably more men in the game than in the actual engagement, but this was the bloodiest part of the actual battle too, so it might have been representative correctly as well.  In the actual battle over the course of four days, roughly 2500 Red Guard attacked the mixed Allied command of roughly 600 soldiers.  The losses were estimated round 500 killed, 30 captured, and unknown wounded for the Red Guard and 30 killed and 100 wounded for the combined Allies forces.  

Below are some pictures from the game.  Enjoy!

Sapper


Miniature game January WW1 Africa

Well, I am finally posting up pics and a brief AAR on another The Sword & The Flame's Dark Africa WW1 game from January of this year.  I just been lazy in getting around to typing up a report.  The game was held at Blake's house using his miniatures and terrain, plus him running the game.  Glenn was the cannibalistic Belgian evil-doers, while I run the peaceful and innocent Germans who were just enjoying their day in the sun relaxing and minding their on business.  

In the game, I played defensively and forced the evil Belgians to attack me using terrain to our advantage.  Glenn made good use of the terrain, but eventually the German Mauser rifles provided to be too accurate for the mean-hearted Belgians to win.  But the heartless Belgians did rout one of my two Askari units before the game ended.  

Below are some pictures from the game.


Sunday, October 2, 2016

Game AAR - Franco-Prussian War...or, How the French stopped Bismarck

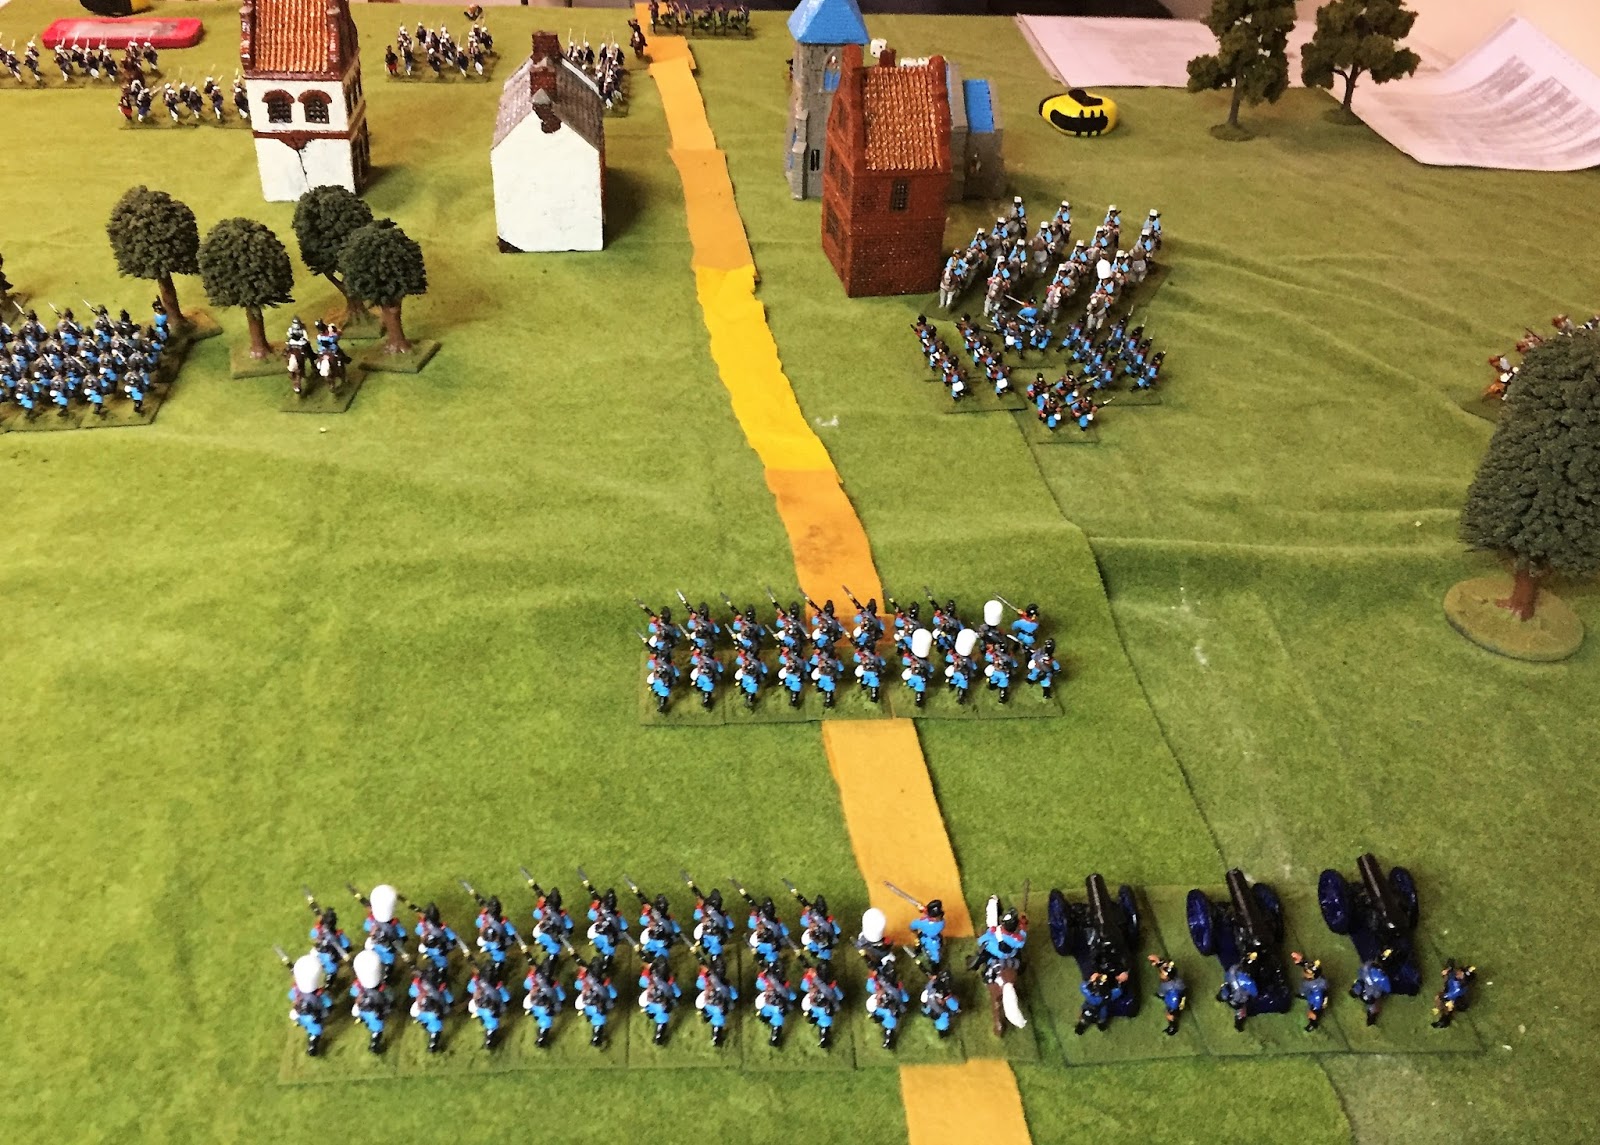
Saturday, I played in a game of 28mm Franco-Prussian War using the Larry Brom's Chasspots & Needleguns.  Blake had us over at his place for the game and provided all of the figures and terrain.  I have mixed feelings about the mechanics of the rules, but it didn't help that my dice rolling was horrible.  Glenn & Curtis played the French, each with a regiment of French Foreign Legion.  Curtis was also running an artillery battalion and a battalion of light cavalry.  Blake and me where pushing a regiment of Bavarians and a battalion of artillery, plus I also had a battalion of heavy cavalry.  The game end with a massive French victory.  Now, on to the pictures...

Glenn and Blake faced off against each other on the left side of this picture.  Blake is advancing in Double Line formations.  I am facing off against Curtis.  I am advancing in Field Columns as I am trying to get to the town first and occupy it for the fortification. 
This picture shows the German heavy cavalry and the heavy siege guns under my command. Notice the nice clear firing lane down main street for Curtis' artillery...the bane of my existence.
So, here we see the French guns are still not shot yet, but the French cavalry has moved and moved quite well for speed!  In response, I did the proper tactic of forming square with my flank battalion.  Note the middle battalion prior to the firing for the first turn.
Now, the French cannons fired, I took heavy losses and was forced back...way back!  This was running back and forth was pretty much the rest of the game for me.
Blake's forces are suffering losses to French Chasspot rifles with greatly out ranges our Dreyse needle gun rifles....like 24" to our 16" range!  Notice also that Blake's artillery is not anywhere where it could fire...yeah, there is a reason I am mentioning this...
Turn two, I change formations to get out of column and the French cavalry charges my square!
Freaking French artillery!!!!  Turn two's firing hit my lead battalion causing them to withdraw all the way back past the rear battalion.  Compare the locations from the prior picture.
Still on turn two, my square shoots up a quarter of the French cavalry, then fails their morale and runs away!  Seriously?!?!? 

Turn three sees my two battalions that have not routed wheel to face the right flank.  The ashamed battalion that routed from a square has retreated to just out of the the picture on the left, but they are still in the game.  Curtis advanced one battalion of infantry in Field Column to support his light cavalry.  I decided to charge my heavy cavalry into this column of infantry before they have time to change formation and the French light cavalry counter charged me on the flank.  That is what the big mass of figures are at the top of the picture.  In desperation, I fired my siege guns into the melee causing one hit to all three units, but everyone passed their morale.
The French won the melee, barely!  I had beaten all of the light cavalry and almost beaten all of the French infantry before my heavy cavalry's bottle failed.  So I had to route and the French held.  The heavy cavalry was later routed off the board by the French cavalry.  That was pretty much it on my flank.  For the rest of the game, I tried to get out of the line of site of the French artillery, but couldn't.  Every time I advanced, I was forced to recoil the same distance back...sigh.  But what about Blake's flank?
For those unfamiliar with the curse of Blake, he has some of the worst dice rolling known to man!  He never could get his artillery to where it was need to shoot because he regularly failed his command rolls to move!  For an example, the pictures above and below are from the same turn in which he tried to use the free action card to do something too... He only needed to roll an eight or less on a d10...
So his infantry advanced into the jaws of death unsupported while the French danced all around him...
Yes, that is a French battalion that behind Blake's force.  Yes, the French moved that fast!

I didn't look at what the total losses where for both sides, but we started off with 46 stands (I think the French had 43 starting.)  At 20 stands lost, the game is over.  At the end of turn 4, we had lost 19 stands!  I am not sure how many stands we lost in turn 5, but it was several.  The French, I think, lost maybe five stands total?  I know I got killed two cavalry and one infantry stand, and might have gotten another.  Blake might have gotten one or two infantry stands too.  Just thank goodness that we left our flags back in Munich. <>

Be seeing you

Sapper


Monday, September 19, 2016

Game AAR - Smiling Ali's Manpower, Inc. has a recruitment drive

Hello,

Well, Blake once again ran another Darkest Africa game at his home (big thanks!) and Glenn and I were the opposing players.  Blake was again using The Sword & the Flame's Sword of Africa supplement. The game was Arabs vs Azande natives and Glenn and rolled off for sides, with who every had the highest die gets the Arab and the lower die gets the natives.  I got the high die, so I played the free market temporary manpower corporation on another recruitment drive for unskilled labor for some clients, and like all good job headhunters, the name of my clients are confidential!

So, Glenn's pool of unskilled labor was six units of 10 spearmen, one unit of 10 bowmen, and one unit of muskets, plus a chief and a shaman.  My band of recruiters were three units of ten Arabic recruiters with a mix of muskets and rifles, two units of Ruga-Ruga talent scouts armed with muskets, an old cannon manned by Arab Health and Safety Officers, and finally Smilin' Ali, the owner and director of this corporation.  

The game started off will Smilin' Ali trying to persuade Chief Glenn to subcontract some of his employees to my manpower corporation and to avoid a messy legal battle with my recruiters.  Sadly he said no, so it was time to make an offer of new employment to Chief Glenn's employees by direct means. [Remember, by clicking on the picture, it will give you a bigger picture.]


I didn't take pictures of the initial set up, that this was about half way through the first turn and had not moved most of my units.  On the left flank are my three units of Arab recruiters.  On the other side of the trail is my Health & Safety cannon and Smilin' Ali standing behind them.  On the right is one of my two Ruga-Ruga talent scouts.  The other unit is just on the other side of that copse of trees.  Across from me from left to right is two units of spearmen, the unit of archers, another unit of spearmen, two units of spearmen in front of Chief Glenn's offices.  In front of those two units of spearmen is the musket unit.  Outside of the picture on the right is the final unit of spearmen.  Barely visible on the trail in the very back is Chief Glenn and his charmin' shaman.


 Here is a picture of the far right flank.


In the finest tradition of our Darkest Africa games the first fire is done by a cannon.  Since this is irregular crewed cannon, I have to roll a die before firing to see if can fire.  I passed every rolled to fire the cannon through the game.  However, since my cannon was crewed by Health & Safety officers, they deliberating shot to avoid hitting anyone!  Only on the first turn did they hurt anyone when they hit the leader of the native musket unit.  Of course, we think that guy was faking his injury so he could make a Workers' Comp. claim.   To give an idea how badly they fired, in theory, I should have averaged 12 hits over the course of the game, but I only got 1!  So this will be the last time we will mention the cannon being involved in the game.


On the left flank Chief Glenn got two units over the stream.  However, the range on my muskets and rifles could shoot up the native archers as they were out of range.  I shot enough of the archers in one round that they routed off the board.


Meanwhile on the right flank, the left unit of Ruga-Ruga traded shots with the native muskets.  While the right unit of Ruga-Ruga were actually Kentuckian riflemen lead by Davy Crockett in disguise, plus were cheating by using rifles with scopes!  Unlike my Health & Safety cannon (OK, this will be the last time I will mention it), these guys shot well over their average!  In theory, they should have hit four natives during the game.  In their first first fire, they hit five (!) figures.  In their next fire they hit four more natives! 


Yeah, that is how I image they were talking between themselves.


Back on the the left flank, the charmin' shaman tried to cast a spell on one of the recruiting parties.  It appears that he forgot that by wearing his mask that it will muffle his voice.


So the first group of job applicants rush forward to give their resumes to my recruiters!
 

After the first screening of the applicants, only six of the ten passed the drug testing screen.  Next was hands on testing for determining if they meet the job position's physical requirements.


I am sorry, but you just don't meet our requirements for a management position with Smilin' Ali's Manpower, Inc.  However, I feel that one of our customers, will be happy to contract you through us. 


At the end of the game, I have four Workers' Comp cases to file as three of my Arab recruiters and one Ruga-Ruga talent scouts (not from the Kentucky riflemen unit) got hurt. 


Unfortunately for Chief Glenn, he will have a bunch of positions to fill in the future.  He loss all ten archers, six musketeers, and eleven spearmen.  It also appears that he lose six elves and one ape wearing power armor!  I don't remember shooting them, but that Kentucky riflemen unit must have shot them while I wasn't looking to see what they taste like.

No worry about all of those open job positions, Chief!  Just call Smilin' Ali's Manpower, Inc., and ask for Babs!

On a serious note (What? Too late now), this game was way too weighed in favor for the Arabs.  Blake agrees in the future that he needs a lot more terrain for the natives to get closer to the Arabs with less losses so they got a chance to get in hand to hand and balancing the scenario.  Either that or a unit of Arabs should be remove or two or three more native spearmen units should be added.  Also, slavery is bad, but I couldn't help letting my dark humor come out.

Cheers,

Sapper

Sunday, July 31, 2016

Russian Civil War & the Allied Intervention in Russia 1918-1922 Project


So as you may have noticed in one of my previous entries, I am doing the Allied Intervention of Russian during the Russian Civil War (RCW).  For a while I have been looking what I planning to have as part of this project and where I plan to expand it.  I figure I will layout my plans here.

Concept of the project:

Small unit combat (about ten figures per unit) during the Russian Civil War in North Russia (Archangel & Murmansk region) and Siberia.  Opposing forces will be forty to hundred figures with one or two vehicles max, per side.  Keep games between one to three hours of actual game time, preferably closer to two hours, and no more than one hours total in set up and take down time as well. 

Rules:  

Right now, I am pretty well set on “The Sword and the Flame” 20th Anniversary Edition (TS&TF) modified with the "Sword of Adventure", Jackson Gamers' Close Combat rules, and some of my own rules.  “TS&TF” has the advantage that it is very well known and as it very simplistic.  But I am modify it to be less deadly (black cards for hits causes morale checks on individual figures instead of wounds), plus some other changes like on the card, the unit can do an action (move or shoot), instead of all move, then shoot.

Forces:

Below are my projected forces for the project.  I might not complete this list, but I will probably get close to it.  Items in brackets are figures I had not got painted yet and might not have bought yet.  I also excluded the items that are only for the War Plan Crimson project.

Bolsheviks
Command: 1x mounted overall commander, 2x foot commanders, 1x Commissar, 1x Flagman, 1x Heroine
Foot Units: 4x 10 Red Guardsmen [2x 10 Partisans, and 1x 10 Cheka riflemen]
Mounted Units: [1x 10 Cossacks]
Support Units: 1x MG teams, [1x Artillery piece, 1x Tachanka, and 1x Garford-Putilov armored truck]

White Russians (I am conceding that some of these troops will not be in winter gear)
Command: [1x mounted overall commander, 3x foot officers, 1x Flagman]
Foot Units: 4x 10 Siberian Rifles (yeah, these guys switched sides since my last entry on this project, but they can also be used for Bolsheviks too) [1x10 Officer Shock troops]
Mounted Units: [3x10 Cossacks]
Support Units: 1x MG team, [1x Artillery piece, 1x Tachanka, and 1x Austin-Putilov armored car]

Czech Legion
Command: [1x foot overall commander, 1x foot officer, 2x NCOs, 1x Flagman]
Foot Units: [4x 10 riflemen]
Support Units: [1x MG team, and 1x Artillery piece]

US Army
Command: 1x foot overall commander, 2x foot officers, 2x NCOs, 4x Sentries
Foot Units: 8x 10 infantrymen (the strong size is for a what-if they were given the go ahead for the more aggressive operations against the Bolsheviks that the British and French wanted them to do.)
Support Units: 1x MG team, [1x M1916 37mm Infantry Cannon, and 1x armored railroad car, sans the wheels, for one of the sleeping quarters/machine gun bunkers they used in Siberia.]

Canadians
Command: 1x foot overall commander, 1x foot officer, 1x NCO
Foot Units: 4x 10 infantrymen
Support Units: 1x MG team, 1x Artillery piece

Others/Neutrals
Individuals: [1x Femme Fatale, + other civilian like spies I can find, plus civilians]
Foot Units: [1x 10 armed railroad workers (from the AVBCW line), 2x 10 Chinese infantry (saw action in Siberia), 1x 10 British infantrymen]
Support Units: [1x armored train, plus cars

My Wish List
Winter coated Japanese, barring that, I might concede and use 1904 Japanese in summer clothing.  If I go that route, I plan to create a force of 2x 10 infantrymen & 1x 10 cavalrymen, plus 1x MG team and 1x artillery piece.  The reason for them to be smaller force is that they would also be beefed up by the White Russians infantry and Cossacks to fight the Bolsheviks…or possibly the Americans!?!?

Yep, this is a big project and will be my main focus for the year.  Almost all of the US Army and Canadians for this project will double for my War Plan Crimson project, except the US M1916 37mm cannon and the Lewis gun squad.  Since I am discussing this now I will list out the additional units for War Plan Crimson here now.

US Army (War Plan Crimson)
Support Units: 1x artillery piece [+1 more MG team, 5x M1917 light tanks, 5x Mack Bulldog trucks, 1x Mark VIII ‘Liberty’ heavy tank]

Canadians (War Plan Crimson)
Foot Units: [1x10 RCMP constables, 2x 10 trappers, 1x 10 Inuit warriors]
Support Unit: [1x Trappers MG team, 1x Carden Loyd tankette, and possibly 1x RCMP sidecar motorcycle with a MG, if I can scratch-build it.]

As you can see, this is a big project!

Be seeing you

Sapper