Current Gaming Projects

Monday, October 17, 2016

New miniatures painted by Fernando

As I mention in my previous entry, I was not able to photograph them outside with natural sunlight, so they appear darker then they are in person.  So let start our journey on what I got painted by Fernando on this last batch.  Also a reminder that by clicking on the picture, there should be a bigger version of it.
  
First up is some more figures for the Russian Civil War
Above is the second half of the Siberian Rifles formation.  This will now give me four units of ten for them.

These two are more for a Pulpy RCW scenario or other games needing Soviet spies, but they are my two Cheka agents, Natasha & Boris...and yes, I have a moose and squirrel that will be in my next batch of miniatures to be painted.

These next two units are for both the Interventionist Allies in the RCW and also for War Plan Crimson
First is some more Canadians.  I needed them to increase the units to be ten man units and some extra Lewis guns teams.

Now is another force of US infantry.  This will give me eight 10-figure units for War Plan Crimson since they will be the attackers.  There is a lot of BARs in this group, but they will replace some of the rifles in the RCW intervention force so in the Crimson games each 10 figure unit will have a BAR.

Next up is a figures for War Plan Crimson and an interwar Cold War skirmish with the Soviets called Ice Station Lima, which is Tiger Miniatures tip of their hat to the novel and movie, "Ice Station Zebra".
First is are heroes of Archaeologists & Scientists.  I actually like the figure on the far right as he is holding a Spanish Conquistador's helmet!  What is that doing all the way up in the Arctic, is a mystery!

Now is a unit of troopers to protect our heroes.  Half are wearing fur coats and the others are wearing skin coats.  

Next is a machine gun team to help protect the heroes' discovery site. 

Well, we have to get the mysterious dingus back to civilization!  What better means for transportation than a reindeer (or caribou if you insist) drawn sled? 

Of course, we have to have the bad guys to try to stop the heroes from just sledding off into the sunset with the dingus!

Next up is more Tiger Miniatures goodness that can be used for War Plan Crimson, Ice Station Lima, or for its only mini-project, Death Hunt.  This is another Tiger Miniatures wink to another movie, "Death Hunt", which is a highly fictional account of the famous pursuit of a mad trapper in the Yukon in 1931-32 by the name of Albert Johnson.  It really is an amazing criminal and survival adventure which you should read up on, even if just the Wiki article.
The three guys in white are the three heroes from the movie, Death Hunt.  Unfortunately, the one on the right should actually be a black American instead of white.  I am going to fix that later.  To the right of them are four Canadian Mounties in winter gear and finally, the mad trapper himself, Albert Johnson.

In the movie, Albert Johnson, played by Charles Bronson, was actually not a bad guy.  Not only was he being pursued by the Mounties, lead by the actor Lee Marvin, but also being pursued by the other trappers that he had a run in with at the beginning of the movie.  Well, these guys are them!  This could make for an interest three game of survival with one player being Albert Johnson, another being the Mounties, the third being the trappers.

This now leads into more figures that are tied into War Plan Crimson, Ice Station Lima, Death Hunt, and now, the Yukon Perils!  Actually the two sets of figures above will also work for the Yukon Perils games too.
Of course we should start off with the good guys of the Royal Canadian Mounted Police lead by SGT Preston and his loyal dog, Yukon King.
 
Next are the trouble makers for SGT Preston's toopers in the line of mad trappers!
 
Now are some treeline toughs that might be trouble or just some rugged individuals. 
 
Some more rugged individuals for the Mounties to deal with or protect. 
 
Yeah, these are Polar Explorers, but could easily be in the Yukon.  Why would explorers be so heavily armed is a good question for the the Mounties to ask! 
 
Being really the only representation of the Canadian government in the Yukon, the Mounties must also deal with checking up on the Inuits and make sure they are not making any trouble. 
 
If they are not diligent in their duties, the Mounties may have to deal with an Inuit rebellion! 
 
Finally, someone that is non-threatening and will probably be needed to be saved by the Mounties at some time during their time in the Yukon.  But what will they need to be saved from?

Why from a polar bear, of course!  But could there be something more dangerous in the Yukon?

Hmm, well a couple of angry Sasquatches would be worst than a polar bear...but could there be something else?

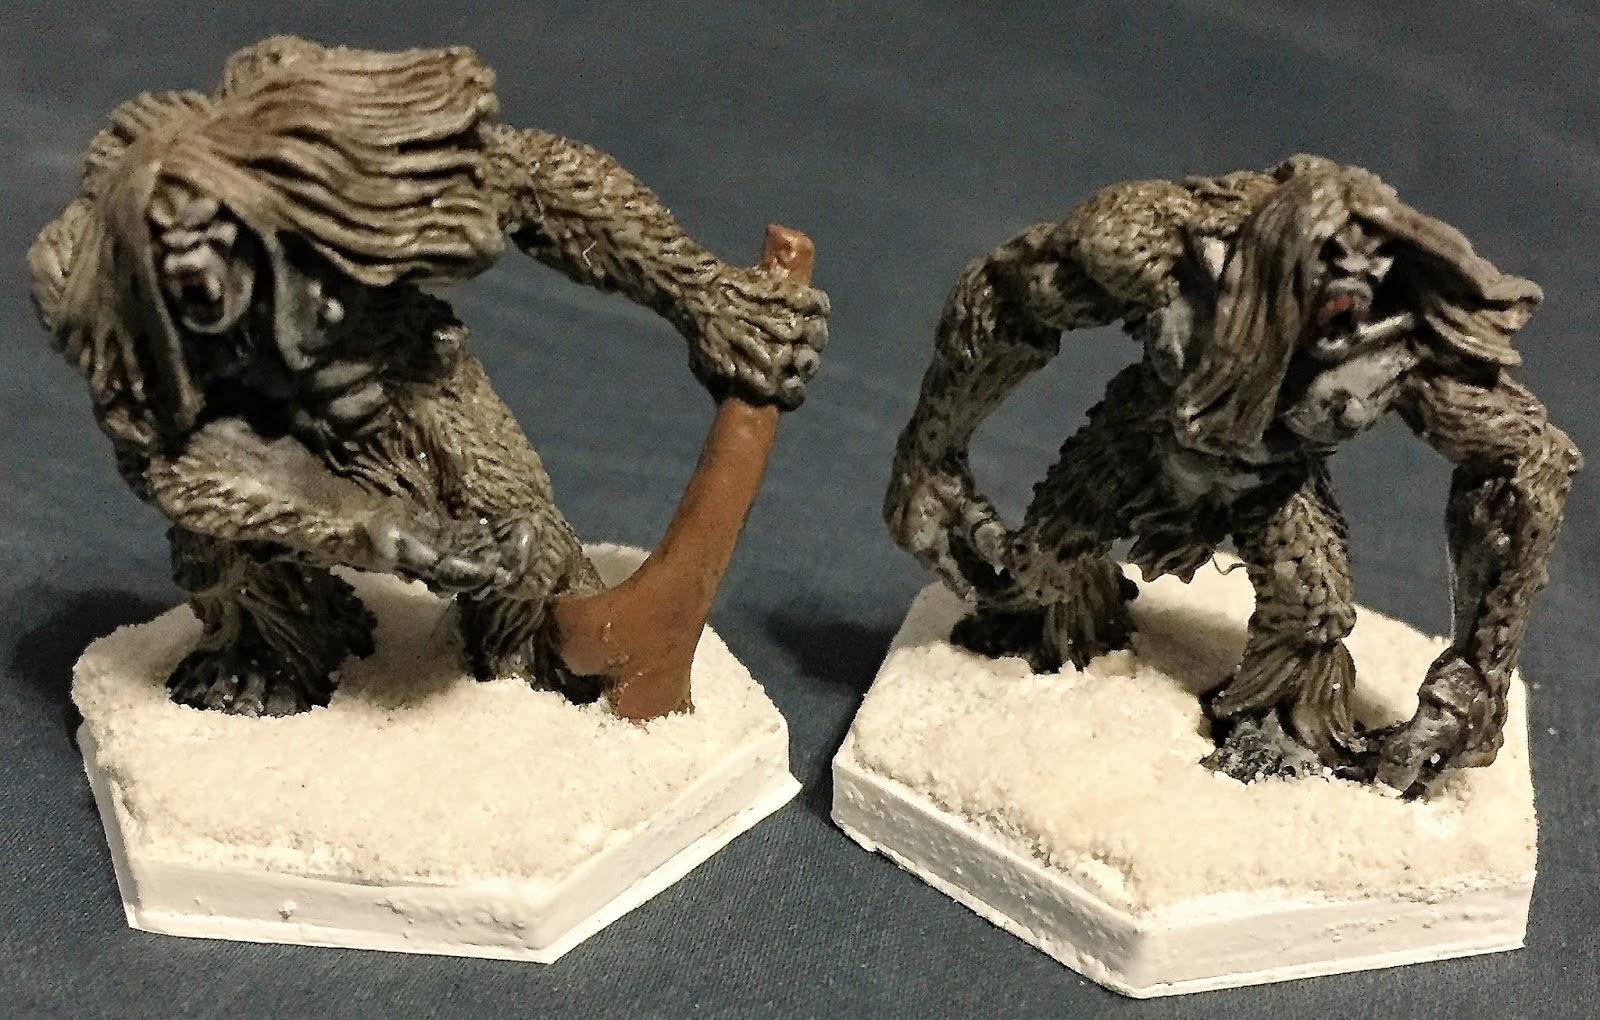
 A family of displaced Yetis!


Now for a moment of Zen...
Be seeing you,
Sapper 


Sunday, October 16, 2016

Review of Fernando Enterprises Miniature Painting Service's packing

Hello,

I know that I spoke of Fernando's Painting Service before, but I never showed pictures of how they pack the painted miniatures for the return shipping.  So I decided to take some pictures of the unpacking of my latest order that I got back earlier but didn't have time to open until today.  I am quite happy with how well protected they were packaged.

I also took pictures of the painted figures which I was not able to do outside for natural light, so the pictures I took are really not that good.  Maybe next weekend, I can get outside with them and get better pictures.  I am going to put them in a separate entry later tonight or tomorrow.

So lets look at the how Fernando's packing with comments under the pictures...

So I didn't quite took a picture of the big outer box, but as you can see above after the outer box is opened and there is a layer of bubble wrap and packing peanuts.  It is a nice heavy cardboard type for box. 
Under that layer of packaging were three more heavy cardboard boxes with the miniatures packed inside them.

Inside each of the smaller boxes are the painted figures individually wrapped in foam.  The box is packed so the figures can not bounce around.  In each box is a list of the miniatures with the ID number on it so you can open them in order to be put in their regular storage.  In this box was two figures that were broken during shipping to Fernando and they were returned so I can do something with them if I want. 
Here is an individual figure wrapped in the foam.  In this picture, I didn't get the cardboard backing on the opposite side that gives a stiffener to the foam so to protect the figures weapons.  I also want to point out how they folded the end of the tape over to give you a tab to grab to pull the tape off...nice!
Here you see the figure and the amount of foam used to protect the paint job, plus the cardboard stiffer.
Not all of the figures that I have done individually based, as in case of this machine gun team.  In most of these cases, they place them in a even in a smaller box for protection.
As you can see, they pack the small box so nothing can move about during shipping!
Now you can see how much space that they filled in around the figures to fill in that smaller box!

I plan to get another batch of Russian Civil War figures off to be painted in a month or so.  Cheers to Fernando!

Be seeing you,
Sapper

Sunday, October 2, 2016

Game AAR - Franco-Prussian War...or, How the French stopped Bismarck

Saturday, I played in a game of 28mm Franco-Prussian War using the Larry Brom's Chasspots & Needleguns.  Blake had us over at his place for the game and provided all of the figures and terrain.  I have mixed feelings about the mechanics of the rules, but it didn't help that my dice rolling was horrible.  Glenn & Curtis played the French, each with a regiment of French Foreign Legion.  Curtis was also running an artillery battalion and a battalion of light cavalry.  Blake and me where pushing a regiment of Bavarians and a battalion of artillery, plus I also had a battalion of heavy cavalry.  The game end with a massive French victory.  Now, on to the pictures...

Glenn and Blake faced off against each other on the left side of this picture.  Blake is advancing in Double Line formations.  I am facing off against Curtis.  I am advancing in Field Columns as I am trying to get to the town first and occupy it for the fortification. 
This picture shows the German heavy cavalry and the heavy siege guns under my command. Notice the nice clear firing lane down main street for Curtis' artillery...the bane of my existence.
So, here we see the French guns are still not shot yet, but the French cavalry has moved and moved quite well for speed!  In response, I did the proper tactic of forming square with my flank battalion.  Note the middle battalion prior to the firing for the first turn.
Now, the French cannons fired, I took heavy losses and was forced back...way back!  This was running back and forth was pretty much the rest of the game for me.
Blake's forces are suffering losses to French Chasspot rifles with greatly out ranges our Dreyse needle gun rifles....like 24" to our 16" range!  Notice also that Blake's artillery is not anywhere where it could fire...yeah, there is a reason I am mentioning this...
Turn two, I change formations to get out of column and the French cavalry charges my square!
Freaking French artillery!!!!  Turn two's firing hit my lead battalion causing them to withdraw all the way back past the rear battalion.  Compare the locations from the prior picture.
Still on turn two, my square shoots up a quarter of the French cavalry, then fails their morale and runs away!  Seriously?!?!? 

Turn three sees my two battalions that have not routed wheel to face the right flank.  The ashamed battalion that routed from a square has retreated to just out of the the picture on the left, but they are still in the game.  Curtis advanced one battalion of infantry in Field Column to support his light cavalry.  I decided to charge my heavy cavalry into this column of infantry before they have time to change formation and the French light cavalry counter charged me on the flank.  That is what the big mass of figures are at the top of the picture.  In desperation, I fired my siege guns into the melee causing one hit to all three units, but everyone passed their morale.
The French won the melee, barely!  I had beaten all of the light cavalry and almost beaten all of the French infantry before my heavy cavalry's bottle failed.  So I had to route and the French held.  The heavy cavalry was later routed off the board by the French cavalry.  That was pretty much it on my flank.  For the rest of the game, I tried to get out of the line of site of the French artillery, but couldn't.  Every time I advanced, I was forced to recoil the same distance back...sigh.  But what about Blake's flank?
For those unfamiliar with the curse of Blake, he has some of the worst dice rolling known to man!  He never could get his artillery to where it was need to shoot because he regularly failed his command rolls to move!  For an example, the pictures above and below are from the same turn in which he tried to use the free action card to do something too... He only needed to roll an eight or less on a d10...
So his infantry advanced into the jaws of death unsupported while the French danced all around him...
Yes, that is a French battalion that behind Blake's force.  Yes, the French moved that fast!

I didn't look at what the total losses where for both sides, but we started off with 46 stands (I think the French had 43 starting.)  At 20 stands lost, the game is over.  At the end of turn 4, we had lost 19 stands!  I am not sure how many stands we lost in turn 5, but it was several.  The French, I think, lost maybe five stands total?  I know I got killed two cavalry and one infantry stand, and might have gotten another.  Blake might have gotten one or two infantry stands too.  Just thank goodness that we left our flags back in Munich. <>

Be seeing you

Sapper